
A Thrift Find …
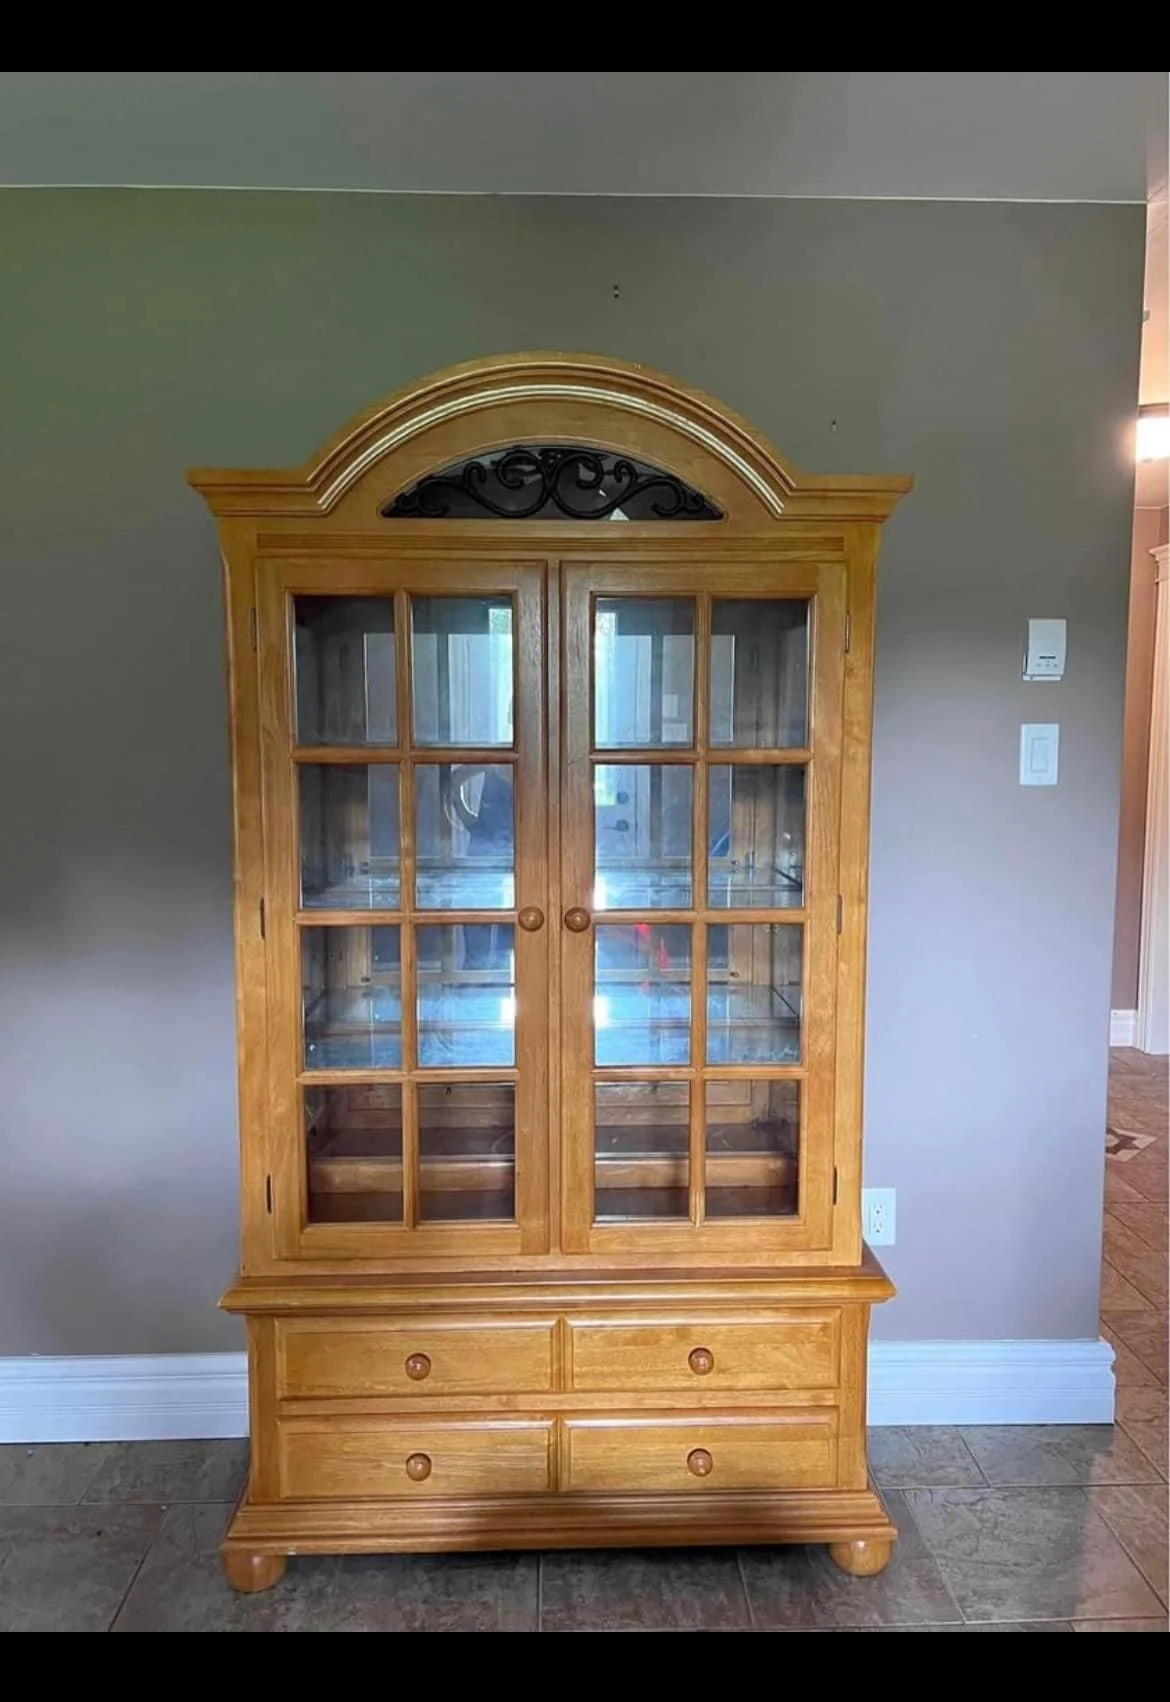
Before
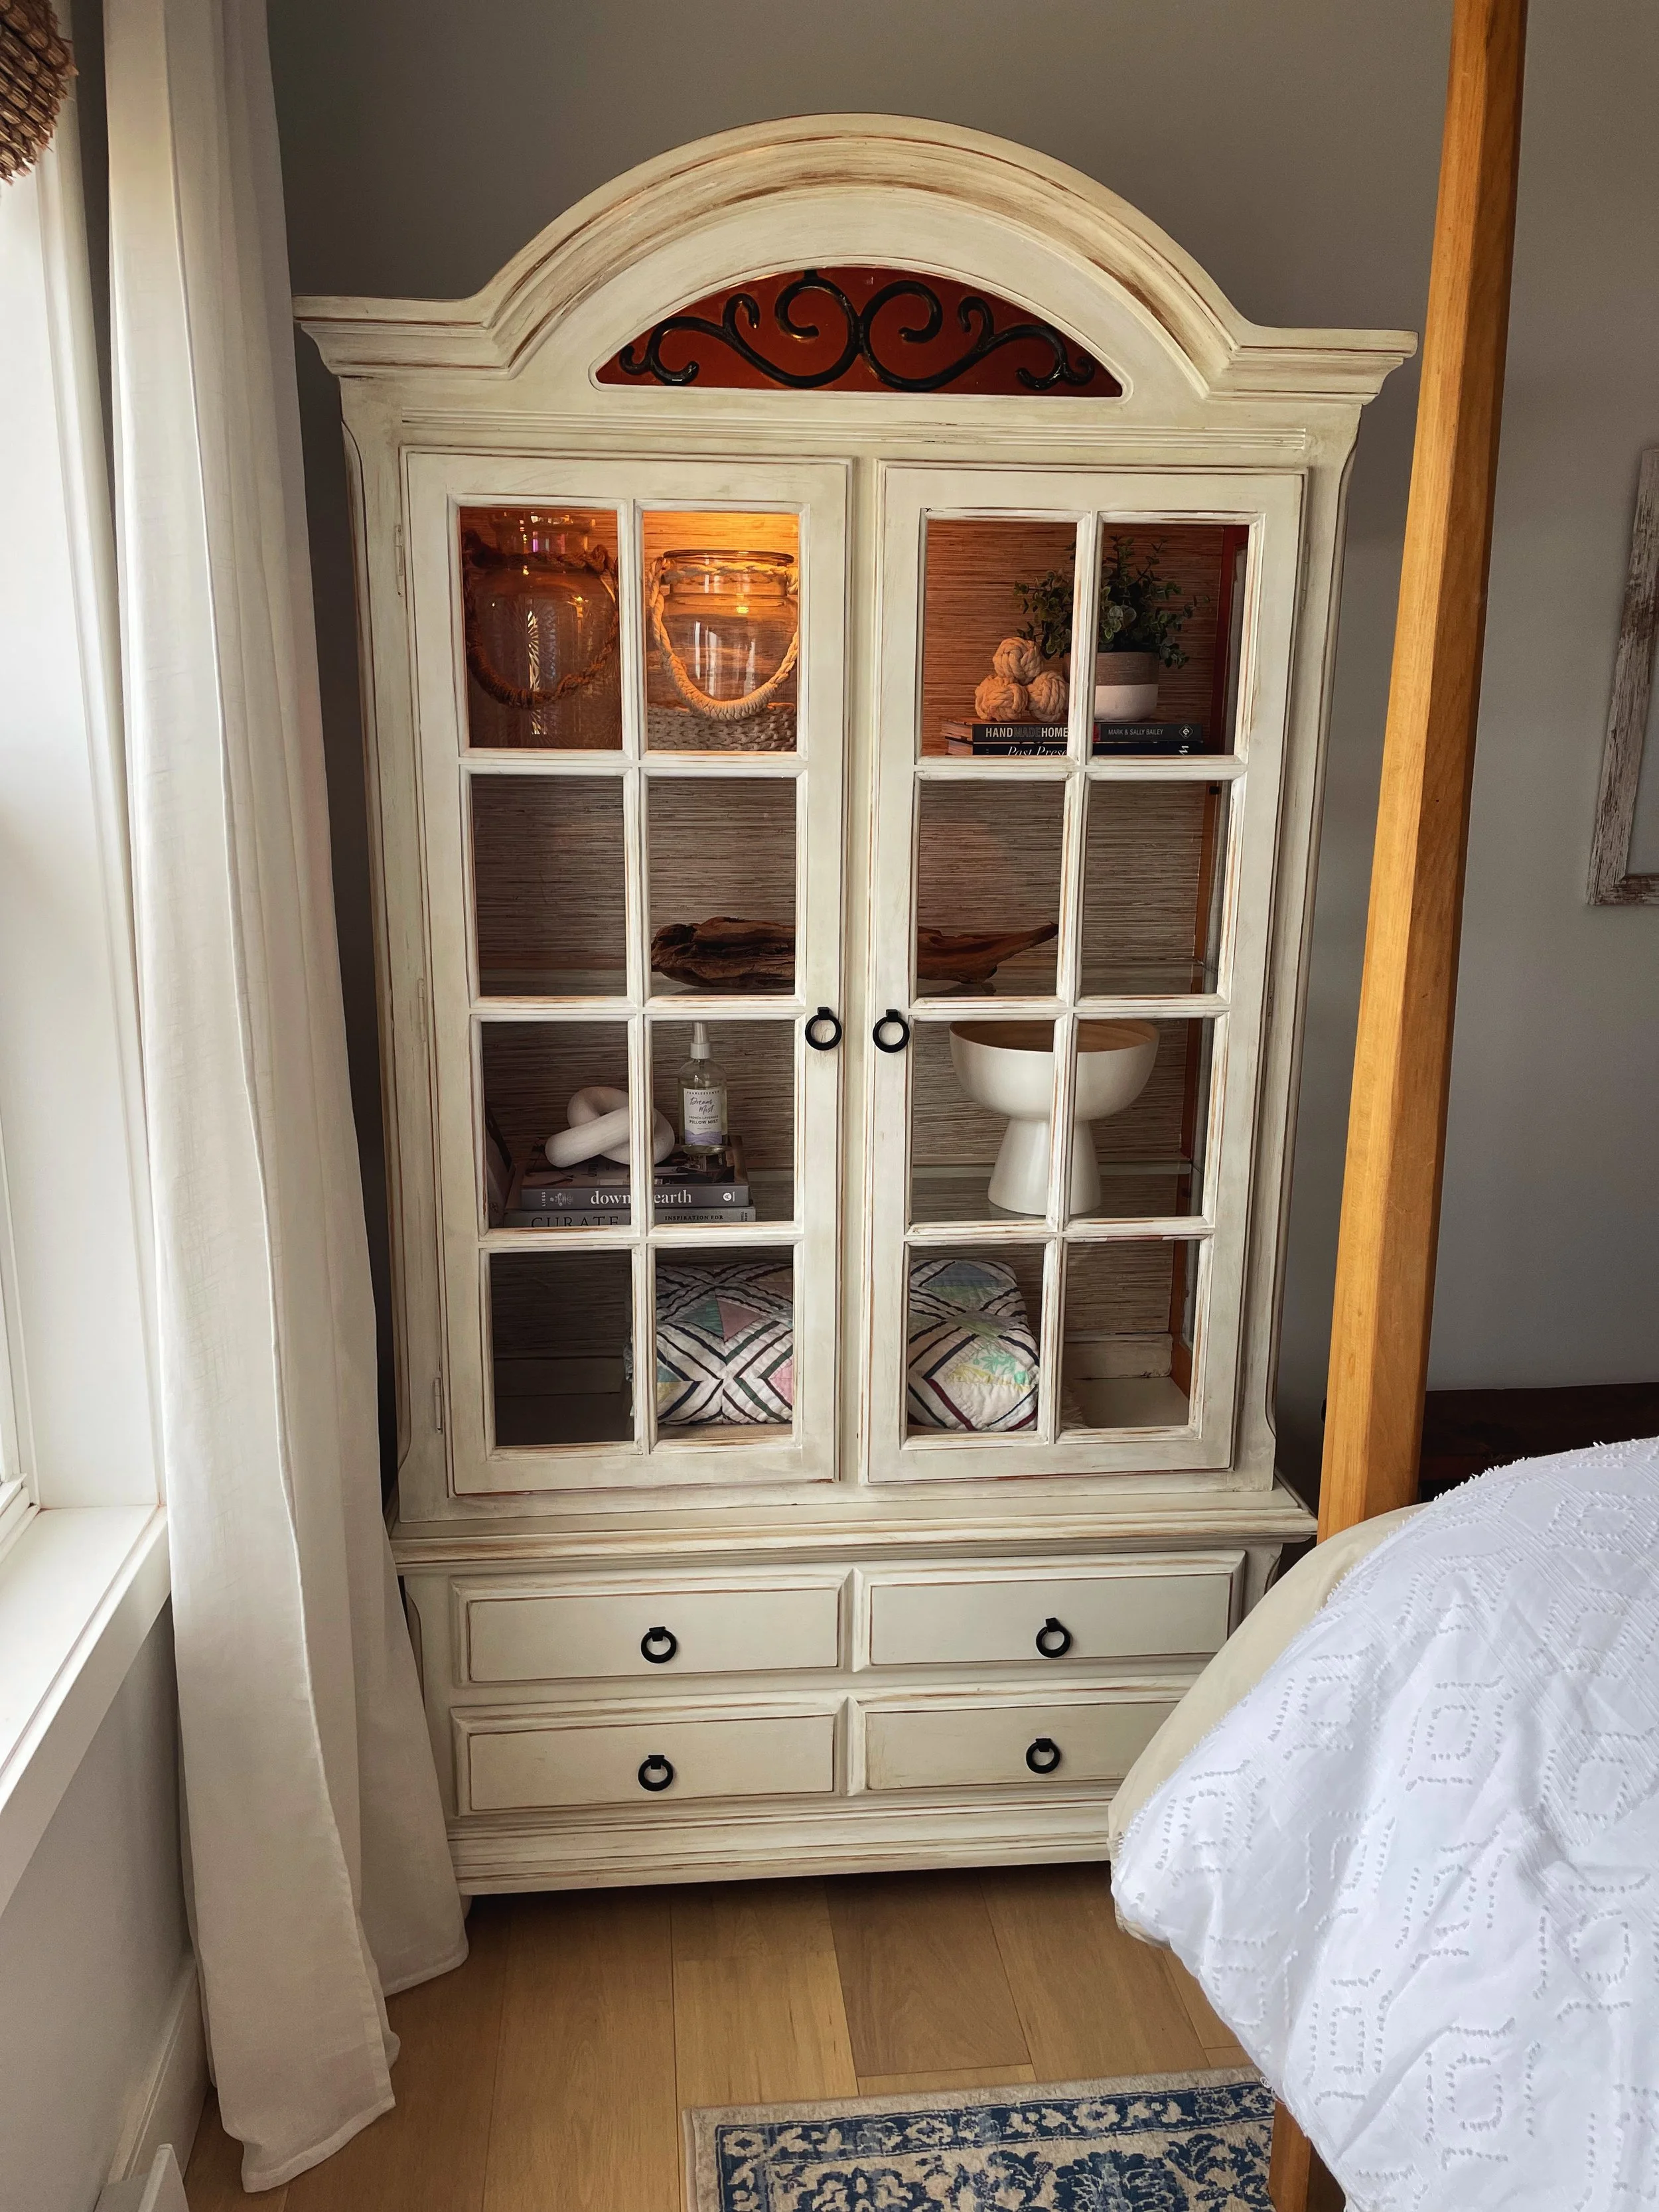
After
I found this little gem on Facebook Marketplace. It is solid wood (heavy!) and in great shape; it just needed a little sprucing up. I originally planned to ‘flip’ it, but fell in love with the final transformation and couldn’t part with it. I think it’s the perfect addition to one of our bedrooms.
Here’s a step-by-step on how I transformed new life into this Facebook Marketplace treasure.
Gathering Supplies:
Orbital Sander (not necessary, but makes it easier than sanding manually)
Chalk Paint (Rust-oleum - Linen White)
Paint brush (trim brush)
Step-by-Step
Clean
I can’t stress the importance of making sure your piece is well cleaned before any ‘work’ can begin. I removed all hardware, the shelves, drawers and the glass from the doors. And then, with warm soapy water (blue Dawn is a degreaser and I find works best), I cleaned everything - including the inside of the drawers.Sand
Using my orbital sander with 120 grit paper, I sanded the entire piece … a good scuff is all that’s needed.Clean (Again!)
Yup - another good cleaning using warm soapy water. The focus was to remove the dust from all that sanding! With the prep work behind, I was now ready to begin the ‘fun’ part of the project - the paint!Paint Primer
Some folks skip the paint primer step. And honestly, it’s probably not necessary especially when using chalk paint, but I had some left over from another project and thought it may help reduce the number of coats of chalk paint. So, I slapped on one coat of the Zinsser primer.Paint
I love working with chalk paint. My ‘go-to’ chalk paint these days is made by Rust-oleum Chalked and for this project, I used Linen White. I applied 2 coats allowing it to dry overnight between coats (length of drying time was probably excessive, but it gave me a nice break). For this piece, I used a round trim brush for all the nook and crannies that were challenging to get at - especially the doors. Other than that, I mostly used a foam roller.
In between paint coats, I gave it a light sanding using 180 grit sandpaper. The sanding removes any debris or particles giving a more professional finish - highly recommend this step! After sanding, be sure to wipe down using a lint-free cloth before applying the next coat of paint.Wallpaper
I wanted to cover the mirror at the back of the unit and what better solution, but peel and stick wallpaper. The wallpaper pattern, seagrass, instantly gave it a more modern flare and was super easy to apply. I considered going with a bold pattern (there are so many!) but happy I settled on a neutral one.Distress Sand
And again … more sanding! Only this time, it’s distress sanding - which is actually fun. Using 120 grit sand paper, sand away the paint so it gives the effect that over time the piece has aged - the corners, the drawers, the doors. There is no way to mess up this step.Decorative Finish - Wax
If you’re happy with the look as is (white), you can buff on a clear wax. I wanted to give it an aged look, so I buffed on the BEHR Wax - dark Antique. Using a lint free cloth and working in small sections, I buffed in the Antique wax - which not only looks great, but doubles as added protection. The wax really highlights the places that were distressed.Installing new hardware
It’s amazing how new hardware can update a piece instantly. I didn’t have to drill new holes (which saves a step) so, it was super satisfying to install the new hardware pulls that I think suits it perfectly.Project Complete!
I love how this little piece turned out. I found a corner for it in one of our bedrooms, but honestly I can see it fitting so many places within our home. But for now, it serves as a lovely and practical piece that holds extra blankets, some reading material and other fun miscellaneous items for our guests to enjoy.